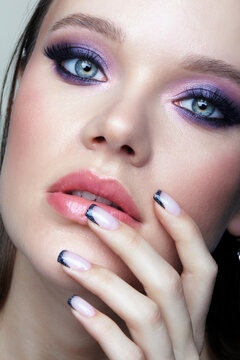
The landscape of modern beauty is a dynamic fusion of timeless techniques and avant-garde expressions. Two of the most impactful styles currently dominating the industry are the classic smoky eye and the youthful, sun-kissed faux freckle trend. While one emphasizes dramatic depth and sultry mystery, the other celebrates natural imperfection and a “no-makeup” aesthetic. Mastering these techniques requires more than just high-quality products; it demands an understanding of facial anatomy, color theory, and precise application methods. This pillar page serves as an exhaustive resource for makeup enthusiasts and professionals alike, seeking to elevate their artistry through detailed tutorials and expert insights.
The Definitive Guide to Crafting the Perfect Smoky Eye
The smoky eye is arguably the most iconic look in the history of cosmetics. It is defined by a seamless gradient of color that transitions from dark near the lash line to light at the brow bone. Achieving this look without it appearing “muddy” or messy requires a disciplined approach to layering and blending.
Essential Tools and Product Selection
Before beginning the application, you must assemble a kit that prioritizes texture and pigmentation. The success of a smoky eye depends heavily on the “blendability” of your shadows. Low-quality pigments often patch or skip, making a smooth gradient impossible.
- Eye Primer: A high-grip primer is non-negotiable. It creates a smooth canvas, neutralizes eyelid discoloration, and prevents the heavy pigments from creasing over time.
- Eyeshadow Palette: You require at least three distinct shades: a transition shade (close to your skin tone), a medium contour shade, and a deep “smoke” shade (charcoal, espresso, or black).
- Eyeliner: A soft kohl or gel pencil is preferred over liquid liner, as it allows for smudging before it sets.
- Brushes: You need a flat packing brush for pigment placement, a fluffy tapered blending brush for the crease, and a small smudge brush for the lower lash line.
The Step-by-Step Smoky Eye Process
The secret to a professional smoky eye is working in thin, buildable layers rather than applying a large amount of dark pigment at once.
- Base and Transition: After priming, apply a neutral transition shade through the crease using a windshield-wiper motion. This acts as a “buffer” for the darker colors to follow.
- Defining the Outer V: Using the medium shade, focus on the outer corner of the eye and the crease. This builds the structural shadow of the look.
- Packing the Darkest Pigment: Apply the deepest shade directly onto the eyelid, staying below the crease. Use a patting motion to ensure maximum color payoff and minimal fallout.
- The Art of Blending: This is the most critical step. Use a clean blending brush to soften the edges where the dark lid color meets the transition shade. The goal is a “smoke” effect where the viewer cannot see where one color ends and the next begins.
- Lining and Smudging: Apply your kohl liner along the upper and lower lash lines. Immediately use a smudge brush to blur the line into the eyeshadow.

Mastering the Faux Freckle Makeup Trend
Freckles, once something many sought to conceal, have become a symbol of youthfulness and “clean girl” aesthetics. The faux freckle trend allows individuals to mimic the appearance of sun-kissed skin without the associated UV damage. The key to a believable faux freckle is irregularity in size, shape, and opacity.
Why Freckles are the New Fashion Statement
The rise of faux freckles corresponds with a broader shift toward “skin realism.” In an era of high-definition cameras, heavy foundation can often look mask-like. Adding freckles back into the complexion after applying foundation restores a sense of transparency and natural texture, tricking the eye into believing the skin is bare.
Top Tools for Creating Realistic Freckles
Choosing the right medium is essential for longevity and realism. Different products offer varying levels of “staining” power.
| Product Type | Pros | Cons |
|---|---|---|
| Freckle Pens | Specifically formulated for skin-like translucency. | Can be more expensive than multi-use tools. |
| Brow Felt-Tips | Fine tips allow for precise, tiny dots. | Often only available in limited “hair” shades. |
| Henna | Semi-permanent; lasts for several days. | High risk of staining errors; requires long processing time. |
| Eyeshadow + Setting Spray | Highly customizable colors. | Prone to smudging if not set correctly. |
Application Methods: Dotting and Layering
To achieve a natural look, you must avoid a symmetrical or “polka-dot” pattern. Natural freckles occur in clusters and vary in intensity based on where the sun naturally hits the face.
Start by applying dots to the bridge of the nose and the tops of the cheekbones. After placing a few dots, immediately tap them with your fingertip or a damp beauty sponge. This “lifting” action softens the edges and pushes the pigment into the skin, making it look like it’s coming from within rather than sitting on top. For added depth, use two different shades of brown—a lighter tan for the majority of the freckles and a deeper chocolate brown for a few “anchor” spots.

Professional Strategies for Combining Bold Eye Looks with Textured Skin
When you combine a heavy smoky eye with faux freckles, you are balancing two distinct focal points. This requires a sophisticated understanding of facial harmony to ensure the look remains chic rather than cluttered.
Balancing Heavy Eyes with Natural Skin Textures
If you are opting for a dark, dramatic smoky eye, the rest of the skin should remain relatively luminous. Using a heavy matte foundation across the entire face can make a smoky eye look dated or “heavy.” By applying a sheer tint and then adding faux freckles, you create a modern contrast. The freckles provide a “grounding” element that makes the dramatic eye makeup feel more wearable and effortless.
Product Longevity and Setting Techniques
The challenge with both smoky eyes and freckles is preventing movement throughout the day. For the eyes, a fine dusting of translucent powder over the finished blend can lock pigments in place. For freckles, a setting spray is your most powerful ally. Look for a “film-forming” spray rather than just a hydrating mist. This creates a microscopic barrier that prevents the freckle dots from being rubbed off by touch or natural skin oils.

Customizing Your Look: Adaptations for Eye Shapes and Skin Tones
Universal tutorials often fail because they don’t account for individual diversity. Both smoky eyes and freckles must be tailored to the wearer’s unique features.
Smoky Eye Variations for Every Eye Shape
- Hooded Eyes: Focus the darkest pigment on the outer corner and bring the transition shade higher up toward the brow bone so it remains visible when the eye is open.
- Monolids: Create a vertical gradient. Apply the darkest shade near the lash line and blend upward, creating an artificial crease that adds dimension to the flat surface.
- Almond Eyes: You have the most flexibility; focus on an elongated “winged” smoky effect to accentuate the natural lift of the eye.
Freckle Placement for Diverse Face Structures
The placement of faux freckles can actually act as a form of non-traditional contouring. If you have a rounder face, placing freckles in a narrow strip across the nose can draw the eye inward, creating a slimming effect. For those with longer face shapes, spreading the freckles horizontally across the cheeks can add a sense of width and balance. Furthermore, ensure the freckle color matches your undertone: cool-toned skin should use ash-brown pigments, while warm-toned skin should opt for golden or reddish-brown hues.
Frequently Asked Questions (FAQ)
- Q1: How do I prevent my smoky eye from looking like a “black eye”?
- The “black eye” look usually happens when dark pigment is taken too far down the lower lash line or too close to the inner corner. To avoid this, always keep your darkest colors concentrated on the outer two-thirds of the eye and ensure your transition shade is warm enough to mimic a natural shadow.
- Q2: Can I create faux freckles if I have active acne or scarring?
- Yes, but it requires strategic placement. Avoid placing freckles directly on top of raised blemishes, as this can draw attention to the texture. Instead, use freckles to “camouflage” flat post-inflammatory hyperpigmentation (PIH) marks by turning them into intentional beauty marks.
- Q3: How do I choose the right eyeshadow shades for my eye color?
- While black and grey are classic, you can use color theory to make your eyes pop. Blue eyes look stunning with copper or bronze smoky eyes; green eyes benefit from plum and burgundy tones; and brown eyes are versatile enough to handle deep navy or forest green “smokes.”
- Q4: What is the best way to remove faux freckles at the end of the day?
- Since many faux freckle products are designed to stain or resist water, an oil-based cleanser or micellar water with an oil phase is the most effective. This breaks down the pigments without requiring harsh scrubbing, which can irritate the delicate skin on the cheeks and nose.
- Q5: Should I apply freckles before or after setting powder?
- For the most realistic look, apply them after foundation but before setting powder. This allows the pigment to meld with the cream base. After the freckles are dry, a light tap of powder over the top will “sink” them further into the skin for a natural, diffused appearance.


