The Foundation of Flawless Makeup: Understanding Your Tools
The journey to a truly impeccable makeup look begins long before the first drop of foundation touches your skin; it starts with a profound understanding of your application tools. The cosmetic industry has evolved rapidly, introducing a myriad of applicators designed to mimic the flawless finish of professional airbrushing. At the center of this evolution are two dominant forces: the classic foundation brush and the revolutionary beauty sponge, commonly referred to as the beauty blender. Understanding the mechanical and material differences between these tools is paramount for anyone looking to elevate their makeup game.
While the quality of your foundation, concealer, and setting powder plays a significant role in longevity and color match, the applicator dictates the texture, coverage, and integration of the product into the skin. A poor tool choice can lead to streaky lines, cakey textures, and uneven oxidation. Conversely, selecting the right applicator for your specific skin type and foundation formula can transform an average drugstore product into a luxury, skin-like finish.
The Evolution of Makeup Applicators
Historically, makeup application relied heavily on fingers or rudimentary sponges that absorbed more product than they deposited. The introduction of synthetic bristles changed the landscape, allowing for precise, hygienic application of liquid formulas. However, the true paradigm shift occurred with the invention of the edgeless, hydrophilic makeup sponge. This innovation provided a solution to the dreaded “brush strokes” left behind by traditional flat brushes, offering a bouncing technique that presses the product seamlessly into the pores rather than painting it over the surface.

The Beauty Blender: Achieving the Airbrushed Finish
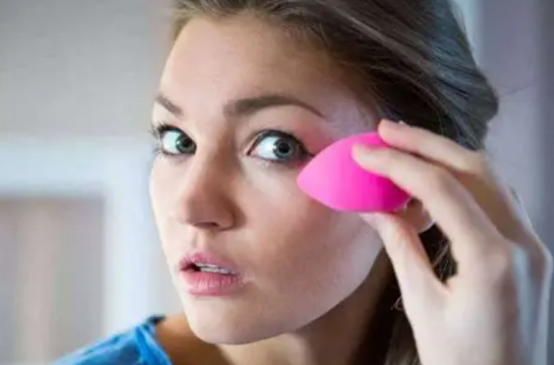
The beauty blender, and high-quality makeup sponges in general, have fundamentally altered the mechanics of foundation application. Made from a unique, latex-free hydrophilic foam, these sponges are designed to be used wet. When submerged in water, the sponge absorbs the liquid, expanding to nearly twice its original size. This expansion serves a critical dual purpose: it makes the sponge incredibly soft and bouncy, and it fills the porous structure with water so that your expensive liquid foundation cannot be absorbed deep into the core of the tool.
The application technique associated with the beauty blender is known as “stippling” or “bouncing.” Instead of dragging the product across the skin, the user gently taps the sponge over the face. This vertical pressing motion ensures that the foundation is deposited evenly and melds with the skin’s natural texture, effectively blurring pores and imperfections without creating micro-exfoliation (which can happen when dragging a brush over dry skin patches).
Best Practices for Sponge Application
To maximize the efficacy of a beauty blender, strict adherence to proper technique is required. Using a dry sponge is a common mistake that leads to massive product waste and a heavy, uneven application. Furthermore, the amount of moisture left in the sponge dictates the finish of the foundation.
- The Wetting Process: Always saturate the sponge completely under running water until it expands fully. Squeeze out the excess water vigorously, and then give it a final squeeze inside a clean, dry towel. The sponge should feel slightly cool and damp, but absolutely no water should drip from it when compressed.
- Product Placement: Instead of applying foundation directly to the sponge, dot the liquid evenly across your face or on the back of your hand. This prevents the sponge from taking on an uneven load of pigment, ensuring a smooth, gradient blend.
- The Bouncing Technique: Utilize the rounded base for larger surface areas like the cheeks and forehead. Use rapid, light bouncing motions. For precision work around the nose and under the eyes, switch to the pointed tip, using the same stippling motion to blend concealers seamlessly into the foundation base.

The Foundation Brush: Precision, Coverage, and Control
Despite the massive popularity of sponges, foundation brushes remain a staple in professional makeup kits for their unmatched ability to deliver full coverage and precise detailing. Foundation brushes are typically crafted with synthetic bristles. Unlike natural animal hair brushes, which are porous and absorb liquid products, synthetic bristles are smooth and non-porous. This means they pick up the foundation and deposit almost 100% of the pigment directly onto the skin, making them incredibly efficient and ideal for achieving maximum coverage with minimal product.
Brushes offer a level of control that sponges simply cannot match. They allow the user to build coverage strategically, painting over blemishes or hyperpigmentation with targeted strokes. Furthermore, brushes are highly versatile; they can be used to carve out sharp contours, define the jawline, and navigate the intricate architecture of the face with surgical precision.
Types of Foundation Brushes
The term “foundation brush” is a broad category encompassing several distinct shapes, each engineered for a specific formula and desired finish. Understanding these variations is crucial for unlocking the full potential of your makeup.
- The Flat Foundation Brush: Resembling a paintbrush, this tool is excellent for slapping on liquid or cream foundations quickly. It is best used with downward strokes to lay the fine vellus hairs on the face flat. However, it requires careful blending to avoid visible streak marks.
- The Buffing Brush (Dense Kabuki): Featuring densely packed bristles with a flat or slightly domed top, this brush is the ultimate tool for buffing product into the skin. By using rapid, circular motions, the buffing brush works the foundation into the skin for a seamless, high-coverage finish that rivals the airbrushed look of a sponge.
- The Stippling Brush (Duo-Fibre): This brush features two lengths of bristles (usually black at the base and white at the tips). It is designed to lightly pick up liquid foundation and stipple it onto the skin, creating a sheer, lightweight, and incredibly natural finish. It is perfect for highly pigmented, watery foundations.

Head-to-Head Comparison: Beauty Blender vs. Foundation Brush
Choosing between a beauty blender and a foundation brush is not necessarily about declaring one superior to the other; rather, it is about selecting the right tool for your specific skin type, the formula of your foundation, and the aesthetic you wish to achieve. A direct comparison across multiple dimensions reveals the unique strengths and potential drawbacks of each applicator.
For individuals with dry, flaky, or mature skin, the beauty blender is often the superior choice. The dampness of the sponge adds a subtle layer of hydration, and the bouncing motion prevents the lifting of dry skin flakes. Conversely, those with oily skin or individuals seeking to cover severe acne might prefer a dense buffing brush, as it presses the pigment firmly into the skin and provides the heavy coverage needed to mask discoloration.
Comparative Analysis of Makeup Tools
| Feature | Beauty Blender (Sponge) | Foundation Brush (Synthetic) |
|---|---|---|
| Coverage Level | Sheer to Medium (Buildable). The dampness naturally sheers out heavy formulas. | Medium to Full. Synthetic bristles deposit maximum pigment onto the skin. |
| Finish | Dewy, natural, skin-like, and airbrushed. | Matte to satin, highly polished, and structured. |
| Product Consumption | High. Even when damp, the foam material will inevitably absorb some product. | Low. Non-porous bristles keep the product on the surface for maximum transfer. |
| Best For Skin Type | Dry, mature, or textured skin (prevents micro-exfoliation). | Normal, oily, or acne-prone skin (allows for targeted, heavy coverage). |
| Maintenance & Hygiene | Requires daily washing. Prone to mold if stored in damp, dark environments. | Requires weekly deep cleaning. Easier to spot-clean with alcohol sprays. |

Unlocking the Secrets of Skin Preparation
The most profound secret in the makeup industry is that perfect makeup application is actually 80% skincare and 20% makeup technique. Attempting to apply foundation over unexfoliated, dehydrated, or oily skin is a recipe for disaster, regardless of whether you use a top-tier brush or a premium sponge. Skin preparation creates the essential canvas that dictates how the foundation will grip, blend, and endure throughout the day.
Proper skin prep involves a multi-layered approach that addresses texture, hydration, and oil control. Skipping these steps often results in foundation that separates around the nose, settles into fine lines, or completely melts off the T-zone within hours of application.
The Multi-Step Preparation Protocol
To ensure your skin is perfectly primed for makeup, you must follow a strategic routine that balances the skin’s pH and moisture levels. This process creates a smooth, barrier-protected surface.
- Gentle Exfoliation: Dead skin cells create a rough microscopic terrain. Using a gentle chemical exfoliant (like a mild AHA/BHA toner) smooths the surface, ensuring that brushes glide effortlessly and sponges bounce without catching on dry patches.
- Strategic Hydration: Even oily skin requires hydration. Applying a lightweight, hyaluronic acid-based serum plumps the skin, minimizing the appearance of fine lines. Follow this with a moisturizer suited to your skin type to lock in the water.
- Targeted Priming: Primer acts as the double-sided tape between your skincare and your makeup. Use a pore-filling silicone primer strictly on the T-zone to blur texture, and a hydrating or gripping primer on the perimeter of the face to ensure longevity.

Advanced Application Techniques for Every Face Area
Once the skin is prepped and the base layer of foundation is applied, the true artistry of makeup application comes into play. The face is a three-dimensional canvas with varying textures, oil production zones, and contours. Applying a single layer of product uniformly across the entire face often results in a flat, mask-like appearance. Advanced techniques require a strategic, zoned approach to product application.
Understanding the anatomical structure of the face allows you to manipulate light and shadow. This involves not only foundation but the seamless integration of concealers, liquid contours, and cream blushes. The goal is to enhance natural bone structure while maintaining a cohesive, skin-like texture.
Zonal Blending and Layering
Mastering zonal application means recognizing that different areas of the face require different amounts of product and distinct blending techniques. Heavy product under the eyes will crease, while too little product on a blemish will fade.
- The Under-Eye Region: The skin here is exceptionally thin. Use a hydrating concealer and apply it sparingly only to the darkest areas (usually the inner corner). Blend using the pointed tip of a damp beauty blender to sheer out the edges without tugging the delicate skin.
- The T-Zone (Forehead, Nose, Chin): These areas naturally produce the most sebum. Use a foundation brush to press a minimal amount of matte foundation into these zones. Excess product here is the primary cause of makeup separation.
- Cheeks and Perimeter: This area handles product well. You can use a buffing brush to seamlessly blend liquid contour into the hollows of the cheeks, followed by a damp sponge to melt cream blush into the upper cheekbones, ensuring no harsh lines remain between the bronzer, blush, and foundation.

Troubleshooting Common Makeup Application Mistakes
Even with the best tools and thorough skin preparation, makeup enthusiasts frequently encounter frustrating application issues. Cakey foundation, pilling products, and rapid oxidation are common pitfalls that can ruin an otherwise perfect look. Identifying the root cause of these issues is the first step toward correcting your application mechanics.
A major culprit behind makeup failure is formula incompatibility. For instance, applying a silicone-based foundation over a water-based primer will almost inevitably cause the foundation to separate and “pill” (roll up into tiny balls) upon application. Understanding the ingredient synergy of your products is just as important as the physical application technique.
Solving the “Cakey” Makeup Dilemma
Cakey makeup occurs when too much product is layered onto the skin, or when powder is applied heavily over a wet base before it has had time to set. To rescue a cakey base, do not add more powder. Instead, take a clean, damp beauty blender and spray it lightly with a hydrating setting spray. Gently bounce the sponge over the heavy areas to melt the excess powder back into the liquid foundation, reviving the skin-like finish.
To prevent oxidation (where the foundation turns orange hours after application), ensure your skincare has fully absorbed before applying makeup. Excess oils from heavy moisturizers can mix with the foundation pigments, causing a chemical reaction that alters the color. Allowing a five-minute resting period between skincare and makeup application drastically reduces this risk.

Building Your Perfect Makeup Tool Arsenal
The ultimate secret to professional-level makeup application is realizing that you do not have to choose exclusively between a beauty blender and a foundation brush. In fact, the most flawless makeup applications usually involve a hybrid approach, utilizing the specific strengths of multiple tools in a single routine. Building a curated arsenal of tools allows you to adapt to any foundation formula, skin condition, or desired aesthetic on any given day.
A comprehensive toolkit goes beyond just the base applicators. It requires a commitment to tool maintenance, as a dirty brush or sponge will not only harbor acne-causing bacteria but will also severely compromise the performance of the tool. Bristles clump together when saturated with old oils, and sponges lose their porous bounce when filled with dried foundation.
The Hybrid Application Strategy
To achieve the absolute pinnacle of makeup perfection, combine your tools. Start by using a flat or buffing foundation brush to distribute the product evenly across the face, establishing your desired level of coverage. Once the product is laid down, take a damp beauty blender and bounce it over the entire face. This final step presses the foundation firmly into the skin, removes any microscopic brush strokes, and absorbs any excess product that could lead to caking later in the day. This two-step hybrid method guarantees both maximum coverage and an undetectable, skin-like finish.
Frequently Asked Questions (FAQ)
- Q1: Do beauty blenders absorb more product than brushes, and does it waste my foundation?
- Yes, by nature of their porous foam material, beauty blenders will absorb more product than synthetic, non-porous brushes. However, this is largely mitigated by properly saturating the sponge with water first. The water fills the internal matrix of the sponge, preventing the dense, expensive foundation from sinking deeply into the core. While there is a slight increase in product usage, the flawless, airbrushed finish it provides is often considered worth the trade-off.
- Q2: How often should I wash and replace my makeup sponge or foundation brush?
- For optimal hygiene and performance, a beauty blender should be washed after every single use with a solid cleanser or gentle baby shampoo, and it must be replaced every 3 months, as the foam inevitably degrades and harbors deep-seated bacteria. Foundation brushes used for liquids should be spot-cleaned daily and deep-washed weekly. With proper care, a high-quality synthetic brush can last for several years without shedding.
- Q3: Can I use a foundation brush for applying liquid, cream, and powder products?
- While synthetic foundation brushes are incredibly versatile and excellent for both liquid and cream formulas, they are generally not ideal for loose or pressed powders. Synthetic bristles tend to grab powder unevenly and can deposit it patchily on the skin. For powders, natural hair brushes or specialized fluffy synthetic powder brushes are highly recommended to achieve a diffused, even dusting.
- Q4: Why does my foundation separate around my nose even when I use a damp sponge?
- Foundation separation around the nose is rarely a tool issue; it is almost always an oil-production and skin-prep issue. The nose has a high concentration of sebaceous glands. If you apply too much moisturizer or a heavy layer of foundation to this area, the natural oils will break down the makeup. To fix this, use an eyeshadow primer on the nose before foundation, and apply only the residual foundation left on your sponge to the nose area, rather than applying fresh product directly to it.


